


While there are so many different things about this time of year I love, I must say wrapping gifts for my loved ones may trump them all. It’s a tradition my family takes very seriously. There may even be a yearly competition between my father and I; I always win obviously (just don’t tell him that). And over the years I’ve picked up a few tricks of the family trade I thought I’d share with you all. Happy Holidays Loves! Truly, MKR

What You’ll Need…
Large, clean surface to work
Sharp scissors are a MUST
Double Sided Tape
Decorative Washi Tape
Tape Cutter
Ribbon and Twine in all different colors, prints, and textures
Wrapping Paper
Tags
Embellishments such as fresh flowers, pine, herbs, candy canes, ornaments, etc.
How to Wrap the Perfect Present…
2. Pull wrap tautly up and over the far end of the box, secure with double-sided tape and crease paper along the box’s edge with thumb and forefinger. Repeat with opposite side. If your cuts aren’t exactly straigh simply fold them under an inch before securing with tape.
3. Next close the edges by folding in the right and left edges pushing the sides in towards your box forming flaps. Then fold down top flap, pulling tightly towards the box and adhering with tape. Repeat on the other side of the package.
4. Finish by facing the package up and creasing the edges with your thumb and forefinger creating a crisp creased edge. Repeat on the bottom of the box.


How to Tie the Perfect Bow…
1. Measure ribbon by wrapping it around the box twice. Make sure to leave enough ribbon so you can trim the edges again after your bow is tied.
2. Create a single tie as you would when tying your shoe. Create two loops one with the first with your right hand then next with your left hand. When making the second loop with your left hand use your right thumb to hold your first knot in place.
3. Pull loop one through and under loop two pulling the ends to create an even bow.
4. Tighten the bow to your desired length and cut the edges in a diagonal. Add gift tag and voila, you’re done.


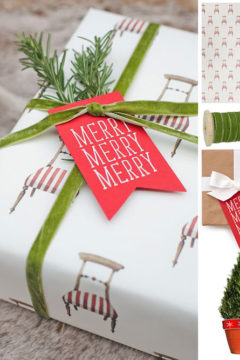
*Photography, Kathryn McCrary || All gift wrap, blanket, tags, twine, and matches available in The Shop


I love me some good gift wrap. Loving the colors of all of these. Great tips!
xo Jessica
http://www.mystylevita.com
A nicely wrapped gift always puts a smile on my face! Almost doesn’t even matter what’s inside…..almost
Thanks for sharing your tips!
Lauren
http://www.spacebyLV.com
I totally agree, big hugs! xo
Thanks doll! xoxo
I am a pretty good gift wrapper, but I never get tired of looking at lovely packages! These are sooo cute. Off to check the shop!
I mean there are few things as good as a greatly wrapped gift! xoxo