Food

Heirloom Tomato Tart

Filed Under > 30 Minute Meals

Heirloom Tomato TartHeirloom Tomato Tart

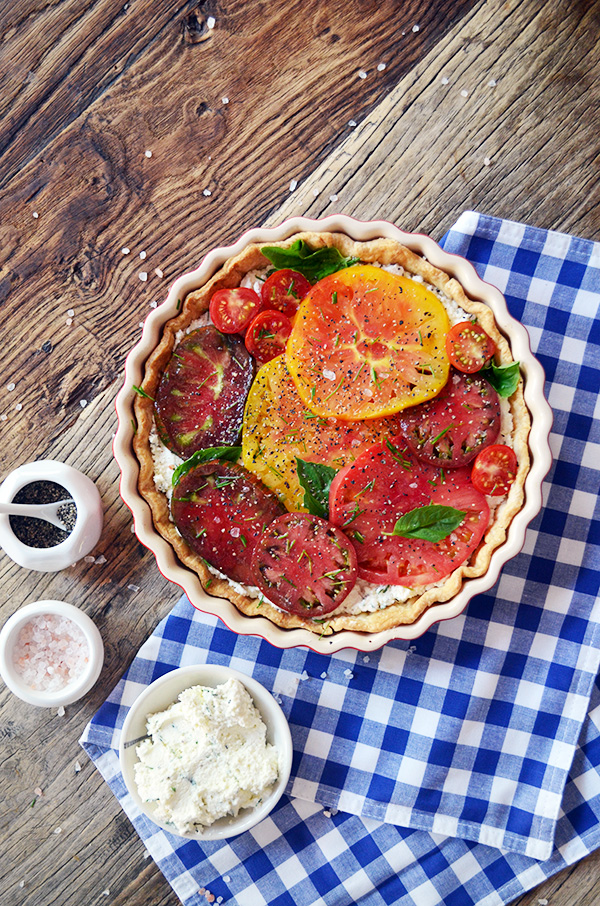
In my kitchen one of the many pleasures of summer will always be the bounty of heirloom tomatoes.  So when the latest Williams Sonoma catalog landed on my doorstep I didn’t have to even open the pages to know I was going to re-create their Heirloom Tomato Tart.  Of course I had to put my own spin on things by subbing out Parmesan cheese for goat and adding chives to compliment the basil, and next time I think I’ll add fresh grilled sweet corn to the mix, but other than that I found the recipe to be a refreshing summer treat.  A treat that will make its way on to my table all summer long.  Enjoy!  truly, MKR

*Le Creuset tart dish  ||  Williams Sonoma placemats (old but I love THESE)  ||  Waiting On Martha salt & pepper cellars  ||  Waiting On Martha fork & spoon dipping dishes  ||  Williams Sonoma pie weights  ||  Williams Sonoma Offset Icing spatula

Heirloom Tomato Tart
Yields 8
Write a review
Print
Prep Time
2 hr
Cook Time
25 min
Total Time
2 min
Prep Time
2 hr
Cook Time
25 min
Total Time
2 min
For the filling
  1. 2 cups ricotta cheese
  2. 2 cups crumbled goat cheese
  3. 1 1/2 Tbs. chopped fresh basil
  4. 1 1/2 Tbs. chopped fresh chives
  5. Salt and freshly ground pepper, to taste
  6. 1 1/2 lb. heirloom tomatoes, sliced 1/4 inch thick
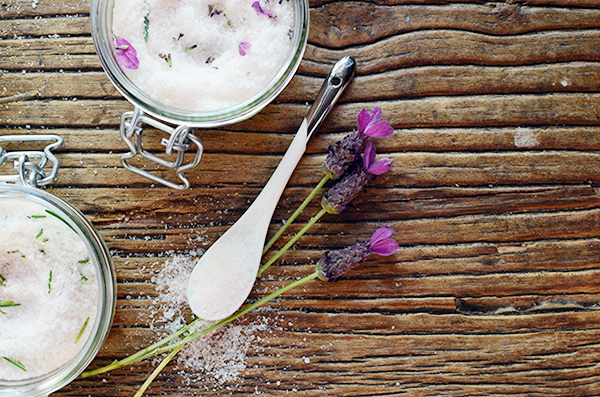
  7. Sea salt and freshly ground pepper for finishing
  8. Small basil leaves for finishing
  9. Chopped chives for finishing
For the dough
  1. 2 1/2 cups all-purpose flour
  2. 1 tsp. salt
  3. 20 Tbs. chilled unsalted butter, cut into 1/2-inch pieces
  4. 1/4 cup ice water, plus more as needed
For the dough
  1. In the bowl of a food processor, combine the flour and salt and pulse 2 or 3 times to combine.
  2. Add the butter and pulse until the mixture resembles coarse meal.
  3. Add the 1/4 cup ice water and pulse 3 or 4 times. The dough should hold together when squeezed with your fingers but should not be sticky. If it is crumbly, add more water, 1 tsp. at a time, pulsing twice after each addition.
  4. Turn the dough out onto a work surface and shape into a 5-inch disk.
  5. Wrap with plastic wrap and refrigerate for at least 1 hour or up to overnight.
For the tart
  1. Position a rack in the lower third of oven and preheat to 400°F.
  2. On a lightly floured surface, roll out the dough to 1/8 inch thick to fit a 10 1/4-inch round tart pan.
  3. Coat tart pan with a non stick baking spray or lightly flour to prevent sticking.
  4. Press the dough into the pan and trim.
  5. Place the tart pan on a baking sheet and fill the pan with pie weights. Bake for 12-15 minutes, then remove the parchment and weights and continue baking until the crust is baked through and light golden brown, about 10 minutes. If edges begin to burn cover with pie or tin foil.
  6. Transfer to a wire rack and let cool completely in the tart pan.
  7. In a bowl, combine the ricotta, goat cheese, chives and basil. Mix, and season to taste with salt and pepper.
  8. Using a small offset (or icing) spatula spread the mixture into the cooled tart shell making it about 1/2 inch thick.
  9. Top with the tomato slices and sprinkle with salt, pepper, chives, and basil leaves.
  10. Serve immediately.
Adapted from Williams Sonoma
Welcome by Waiting on Martha https://waitingonmartha.com/
*All images original to Waiting On Martha

Blueberry Nut Crumble Muffins

Filed Under > Breakfast & Brunch

blueberry muffinsblueberry muffins

I’m not sure if there is anything food wise that reminds me of growing up like blueberries.  Maybe it’s because I was an extremely picky eater as a child and blueberries were one of the few foods I loved, or maybe it was because we always had freshly picked blueberries on hand.  Regardless, one of my many blueberry pleasures is blueberry muffins.  So when I was thinking about how I could elevate the standard muffin I thought why not a take a que from my blueberry nut crumble and make blueberry muffins with a nut crumble topping?  That crunch combined with warm fresh blueberries and just a hint of cinnamon and vanilla…well lets just say I don’t think I’ll be going back to “standard” blueberry muffins anytime soon.  truly, MKR

Blueberry Nut Crumble Muffins
Write a review
Print
Prep Time
20 min
Cook Time
20 min
Total Time
40 min
Prep Time
20 min
Cook Time
20 min
Total Time
40 min
Ingredients
  1. 1 1/2 cups all-purpose flour
  2. 3/4 cup white sugar
  3. 1/2 teaspoon salt
  4. 2 teaspoons baking powder
  5. 1/3 cup vegetable oil
  6. 1 egg
  7. 1/3 cup milk
  8. 1 1/2 cup fresh blueberries
  9. 1 teaspoon Vanilla
  10. 1/2 teaspoon Cinnamon
  11. For the crumble
  12. 3/4 cup chopped nuts (walnuts, almonds and pecans)
  13. 1 tablespoon brown sugar
  14. 1 tablespoon melted butter
  15. 1/4 teaspoon Cinnamon
Instructions
  1. Preheat oven to 400 degrees
  2. Grease muffin cups or line with liners
  3. In a mixing bowl add flour, sugar, salt, cinnamon, and baking powder
  4. In a separate bowl mix vegetable oil, egg, milk, and vanilla, mix and add to the flour mixture
  5. Fold in blueberries and combine
  6. For the nut crumble topping
  7. Add chopped nut mixture, brown sugar, cinnamon, melted butter and mix together
  8. Fill muffin cups 3/4 full and sprinkle with nut crumb topping mixture
  9. Bake for 20 to 25 minutes in the oven or until done you can insert a toothpick in the center and it comes clean
  10. Let cool 5 minutes before enjoying
Welcome by Waiting on Martha https://waitingonmartha.com/
*All images original to Waiting On Martha

DIY Flavored Salts

Filed Under > Dressing & Sauces

DIY Flavored SaltDIY Flavored SaltDIY Flavored Salt

There’s nothing better than giving a homemade gift.  Scratch that there’s nothing better than giving an EASY homemade gift.  And that’s just what these DIY flavored salts are; easy and homemade.  Using dried herbs such as lavender and rosemary plus a mix of kosher and pink salts, these pretty packages will make the perfect heartfelt hostess gift or favor for any food lover in your life.  Happy Monday Loves!  truly, MKR

*Silver Teaspoons  ||  Glass Jars

Flavored Salts
Write a review
Print
Ingredients
  1. 2-4 oz. Glass jars
  2. Equal parts finely crushed kosher salt and pink salts
  3. Dried herbs or fruits such as lavender, rosemary, thyme, orange, lemon, lime, etc.
Instructions
  1. In a bowl mix equal parts pink and kosher salts
  2. Mix in dried herbs and/or fruits
  3. Pour into containers and complete with a ribbon, tag, or in our case a little silver spoon
Welcome by Waiting on Martha https://waitingonmartha.com/

*All images original to Waiting On Martha 


Copyright © Welcome by Waiting on Martha  /
Back to Top