Worth Noting

How To: Growing An Indoor Herb Garden

Filed Under > How To

Growing an indoor herb gardenGrowing an indoor herb gardenGrowing an indoor herb gardenGrowing an indoor herb garden Growing an indoor herb garden  

There’s nothing I love more than infusing fresh herbs from my kitchen herb garden into whatever I’m cooking or cocktailing.  And whether you consider yourself an expert or novice gardener, mastering a small indoor herb garden is easier than you think.  

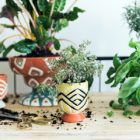
To get started, gather planters of different shapes and sizes (these are from Anthropologie), organic potting soil and your preferred seeds or already-planted herbs. When selecting your preferred herbs, think of how you’ll use them.  Sprigs of thyme add a crisp bite to everything from roasted vegetables to hearty soups.  Fresh cut basil is the perfect way to garnish a salad, and a necessity for any margherita pizza.  Parsley garnishes every dish with a much-needed pop of color.  Mint is a mojito staple and will make your entire kitchen smell heavenly.  And if you find yourself regularly cooking with one herb more than others, plant that herb in one of the larger planters and double up on seeds.  

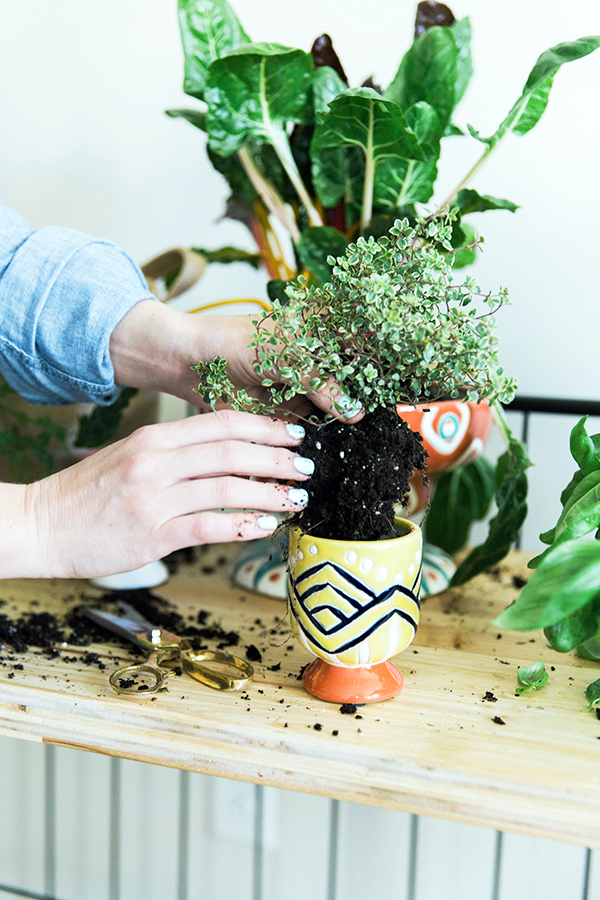
When moving the herbs from the store containers to your planters, gently break up the roots with your fingers and place the herbs in the center of your planter. Then, surround the plant with additional soil. Lightly pat down the soil, but make sure not to overcrowd the herbs or add too much soil—you want to always give the plant room to grow. (See the slideshow below for an easy four-step tutorial.)

Each herb will vary slightly when it comes to water and sunlight. Make sure to read the directions accompanying each plant. For example, herbs like basil, need more sunlight and water than rosemary, which will flourish even when being neglected.  I’d also suggest investing in a plant mister for the herbs, and keep in mind that as the herbs begin to outgrow their original planters, you can easily replant them outside where they’ll have more room to flourish, or split the herb to keep one portion inside to have on hand, and the other remaining outside.

Your edible herb garden, filled with sage, rosemary, and other fragrant herbs, will be a much-loved addition to your kitchen.  Do you plant and use herbs regularly?  Truly, MKR

SHOP THE STORY / CLICK LEFT & RIGHT ARROWS TO EXPLORE 


STEP 1: LOOSEN THE ROOTS

STEP 1: LOOSEN THE ROOTS

WHEN MOVING THE HERBS FROM THE STORE CONTAINERS TO YOUR PLANTERS, GENTLY BREAK UP THE ROOTS WITH YOUR FINGERS AND PLACE THE HERBS IN THE CENTER OF YOUR PLANTER.

PHOTOGRAPHY, KATHRYN MCCRARY
STEP 2: ADD ADDITIONAL SOIL

STEP 2: ADD ADDITIONAL SOIL

SURROUND THE PLANT WITH ADDITIONAL SOIL, BUT MAKE SURE NOT TO OVERCROWD THE HERBS OR ADD TOO MUCH SOIL—YOU WANT TO ALWAYS GIVE THE PLANT ROOM TO GROW.

PHOTOGRAPHY, KATHRYN MCCRARY
STEP 3: PAT DOWN & WATER

STEP 3: PAT DOWN & WATER

LIGHTLY PAT DOWN THE ADDITIONAL SOIL AND WATER.

PHOTOGRAPHY, KATHRYN MCCRARY
STEP 4: FOLLOW THE DIRECTION

STEP 4: FOLLOW THE DIRECTION

PER THE HERB'S DIRECTIONS, PLACE THE HERB WHERE IT WILL GET THE APPROPRIATE AMOUNT OF SUNLIGHT.

PHOTOGRAPHY, KATHRYN MCCRARY

Photography, Kathryn McCrary  |  This story is in collaboration with Caldrea and the Caldrea Gardens.  Opinions and images are 100% our own.

The Top Ten Tools Every Baker Should Own

Filed Under > Worth Noting

Top Ten Baking Tools, Waiting On Martha  ||  Photography Kathryn McCraryThe Top Ten Tools Every Baker Should Own, Waiting On Martha  ||  Photography Kathryn McCraryTop Ten Baking Tools, Waiting On Martha  ||  Photography Kathryn McCrary

With the Holidays fast approaching I thought I’d let you peek inside my pantry to see the top ten baking tools I believe every baker should own.  And it was hard to narrow it down to ten, I didn’t even include my beloved Silpat Mats (probably because I’ve talked about them at least a dozen times before on the Blog), so I’d love to hear if I’ve left off one of your baking necessities?  Truly, MKR

No. 01 – Ice Cream Scoops.  Not just for ice cream scoops will allow you to scoop consistent amounts of batter into muffin pans, cupcake pans, and cookie dough so your cookies are of similar shape and size.  Just make sure you get the scoop with a spring loaded wire scraper so it will easily release your batter our dough.

No. 02 – Rolling Pins.  I have so many rolling pins I’m beginning to lose count, but if I could only narrow it down to two I’d have a tapered rolling pin and your standard 12″ wood rolling pin.  

No. 03 – Prep Dishes.  It’s always best to have all of your ingredients measured, chopped, and ready to go in numerous prep dishes so you’re not rushing around the kitchen trying to get the right amount poured in at the right time.  Plus it helps to keep the kitchen on the tidy side.

No. 4 – Bakers Twine.  Twine is an absolute kitchen necessity, I just prefer the striped bakers twine as its perfect for pretty packaging.

No. 5 – Pastry Cutters.  What can I say I like fancy pie crust.  And speaking of pie may I suggest these and this, also baking must haves for me.

No. 6 – Icing Spatula.  I have at least 5 icing spatulas in all different sizes, they really are the end all be all for icing cakes.

No. 7 – Nielsen-Masey Vanilla.  Yes I know it’s expensive, but the taste of your food is always a reflection of how good your ingredients are so always bake with the best.  

No. 8 – Microplane Grater.  One of my kitchens most used tools a microplane grater is perfect for adding cinnamon and nutmeg spice and citrus flakes to any dish.

No. 9 – Cooling Racks.  I’m guilty of not allowing my desserts to properly cool before attempting to ice, or remove from the pan, etc.  I’ve learned my lesson though and now everything is cooled appropriately on racks.

No. 10. – Salt Pig.  Baking is all about getting the precise, exact measurement and a salt shaker just won’t do.  Get a pig or a salt bowl so you can get just the right 1/8 teaspoon when needed.

*Photography, Kathryn McCrary

shopthestory


…AS PICTURED…Measuring Cups, All Clad  ||  Napkins, Found Vintage (similar HERE)  ||  Rolling Pin, A Sunny Afternoon  ||  Olive Wood Bowl, Sur La Table  ||  Fork & Spoon Dipping Dish, Waiting On Martha  ||  Icing Spatula, Sur La Table ||  Ice Cream Scoop, Williams Sonoma  ||  Pastry Cutter, Williams Sonoma  ||  Nielsen-Masey Vanilla, Williams Sonoma  ||  Microplane Grater, Williams Sonoma  ||  Bakers Twine, Williams Sonoma  ||  Marble Pastry Board, Sur La Table  ||  Cooling Rack, Sur La Table  ||  Olive Wood Salt Bowl, Williams Sonoma  ||  Pink Salt, Williams Sonoma


La Crema Virtual Vintner

Filed Under > Entertaining

A Harvest Dinner Party, Waiting On MarthaLa Crema Virtual Vintner Dinner PartyLa Crema Virtual Vintner La Crema Virtual Vintner, Waiting On MarthaLaCrema5Harvest Dinner Party, Waiting On MarthaLa Crema Virtual Vintner, Waiting On MarthaHarvest Dinner Party, Waiting On MarthaSalt CellarsLaCrema2Pasta & Croistini Fall EntertainingCroistini 7 Ways, Waiting On MarthaFall Dinner Party, Waiting On Martha

It’s no secret I love wine.  In fact I’d say its become a true passion of mine.  So when La Crema (a wine I’ve been drinking for years) reached out about their Virtual Vintner program I was all in.  In fact not only was I all in, but so where my girlfriends who I invited over for a little dinner party to test out the Virtual Vintner program and of course toast it with a glass or two (or three) of  La Crema

Virtual Vintner is a digital initiative of which the wine world has never seen.  It allows consumers an intimate, hands-on look into the world of wine making.  A “choose your own adventure” style journey captured through digital touch points and real time voting where consumers are able to learn about varietals, appellation, specific vineyards, barrel treatment, and even wine naming and label design.  A journey that will ultimately determine a finished wine released in late Fall 2015.  Its a way for everyone, regardless of who they are and where they are, to experience the beauty that is wine making.  A beauty that I’m also thrilled (on cloud nine) to say I’m going to be experiencing first hand.

You see La Crema is making one of my dreams come true.  They’ve graciously invited me to work harvest at their vineyards in Sonoma.  That’s right, starting next Monday I’ll be heading back to my favorite place on earth to crush some grapes and make some wine.  And just to be clear I’m not talking tour the vineyards and taste wine all day, I’m talking work.  No matter the weather conditions, however many hours a day, bugs be damn, whatever harvest calls for is what I’ll be doing.  I’m half scared (I mean I’m really not cut out for physical labor) half excited beyond belief.  And I’ll be taking you all along for the ride through a digital diary on Instagram, Twitter and Facebook so make sure you’re following to see what a day in the life of a vintner is really like.  Cheers!  truly, MKR

P.S. I’m also sharing my Crostini 7 Ways recipe from above over on the La Crema’s Blog so while you’re checking out Virtual Vintner make sure you grab that for your next dinner party. 

*La Crema Pinot Noir & Chardonnay  ||  Faux Bois Plates, Waiting On Martha  ||  Olive Oil Plates, Dipping Dishes, & Olive Oil Container, Waiting On Martha  ||  Wine & Water Glasses, One Kings Lane  ||  Gold Silverware, One Kings Lane (sold out, similar HERE)  ||  Vases, Waiting On Martha (email for availability)  ||  Silver Spreaders, Waiting On Martha (email for availability)  ||  Coasters, Waiting On Martha  ||  Napkins, Ice Milk Aprons c/o  ||   Candles Sticks, Pottery Barn  ||  Striped Taper Candles, Waiting On Martha  ||  Salt & Pepper Cellars, Waiting On Martha  ||  Antique Silver Condiment Set, Pottery Barn c/o  ||  Pig Cutting Board, Williams Sonoma  ||  Feathers, Pottery Barn  ||  Lighting, Currey & Company

**Photography, Rustic White  ||  This post was sponsored by La Crema a brand I love and adore.  Recipes and opinions are 100% my own.

Copyright © Welcome by Waiting on Martha  /
Back to Top