I’ve always been a fan of a great at-home bar. I strongly believe it’s a must-learn life skill to mix up classic cocktails, and as an avid host, it’s important to provide an array...
Looking back on Easter as a child, I remember how excited I was to dig through my Easter basket. Full of chocolate bunnies, malt ball Easter eggs, Peeps, golden coins, and my favorite Cadbury...
Lets be honest, salads can be boring. So I’m always trying to think outside of the box to come up with salad recipes that I’ll thoroughly enjoy, but are beyond easy to make. Enter...
Lets be honest, salads can be boring. So I’m always trying to think outside of the box to come up with salad recipes that I’ll thoroughly enjoy, but are beyond easy to make. Enter...
It all started back when I saw MKR’s wickedly chic Halloween shoot a few years ago…I started to believe that the Haunting Holiday can be just as beautiful and stylish as the rest. As MKR proves in her shoot, IT IS possible to avoid tacky, orange-and-black-themed everything, and instead blend silvers and greys with black, as you mix in candles, moss branches, spiders, crows and chains. Forget tchotchke and generic, and think tasteful and eerie. With great decor, a killer menu and the right costume (at least rock the stylish skull motif), you’ll be well on your way to hosting the best Halloween party on the block.
SHOP THE STORY / CLICK LEFT & RIGHT ARROWS TO EXPLORE
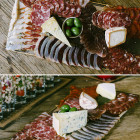
PREPARE A HAIR-RAISING SPREAD
SELECT CURED MEATS WITH AN UNCANNY RESEMBLANCE TO FLESH AND TASTY CHEESES AND OLIVS, LINE THEM UP ACCORDINGLY AND VOILA! YOU HAVE A HAIR-RAISING CHEESE PLATE THAT ALL WILL BE HAPPY TO DEVOUR.
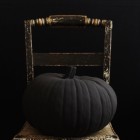
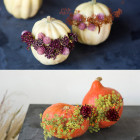
TAKE THE NATURAL ROUTE AND DECORATE WITH FLORAL WREATHS
GIVE YOUR PUMPKINS A NATURALLY WHIMSICAL MAKEOVER WITH THIS FLORAL WREATH DIY. THE RESULT? GORGEOUS PUMPKINS THAT YOU'LL WANT TO KEEP AROUND WELL AFTER THE PARTY.
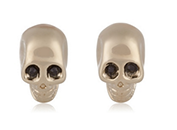
EVEN IF YOU'RE NOT WEARING A CRAZY COSTUME OR EXPERIMENTING WITH BODY MAKEUP THIS YEAR, YOU CAN STILL EMBRACE HALLOWEEN'S CHIC MOTIFS. OUR FAVORITE? SKULLS. AND WE'LL BE WEARING THEM LONG AFTER THE HOLIDAY IS DONE.
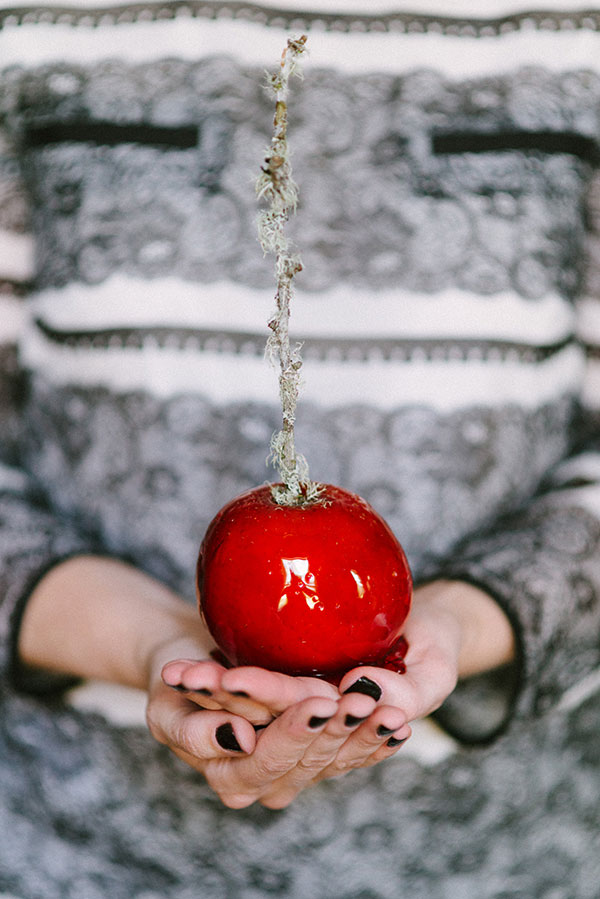
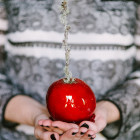
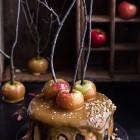
HERE'S A TREAT THAT'S JUST AS STUNNING AS IT IS TASTY, AND FOR KIDS OF ALL AGES. BE SURE TO WHIP UP A FEW OF THESE PERFECT CANDY APPLES AND DISPLAY FOR YOUR GUESTS TO ENJOY...THOUGH THEY'RE ALMOST TOO PRETTY TO EAT!
WITH A CHIC PARTY TO HOST, DON'T FORGET ABOUT THE HUNDREDS OF ADORABLE AND HILARIOUS OPTIONS OUT THERE. DO YOURSELF A FAVOR AND DRESS UP YOUR PETS. THEY'LL BE THE HIT OF THE PARTY!
Happy Halloween! If you’re anything like me, you’ve procrastinated a bit this year (the holiday falls on a Saturday after all) and may need a little last-minute inspiration to pull together a festive spread.
Earlier this week, we rounded up several must-try ideas for your haunting party this weekend—a great place to start. But really can we just talk about the beyond-wickedly chic Halloween party that MKR styled a few years ago?! Definitely worth pulling out of the archives to share again in time for a little last-minute party inspiration.
It is indeed possible to put a chic, stylish spin on this holiday, and MKR shows us how it’s done. A blend of silvers and greys mix in with black accents to create a color palette that is as beautiful as it is spooky. Candles upon candles upon candles, moss and fun little accessories complete the design, though the grub and libations take the cake in my opinion. Her recipe for the perfect candy apples and warm bourbon punch may just be everything you need to impress your guests tonight. Leave all of that kitschy orange-and-black everything behind! Cheers, Kat
SHOP THE STORY / CLICK LEFT & RIGHT ARROWS TO EXPLORE
I love the holidays. All of the holidays. So each year when Halloween rolls around it’s all about how I’m going to decorate my pumpkins. Last year I did a gorgeous monogrammed theme…I wish I could find the pics to share. Anyway, this year it’s all about the metallics.
My look was relatively easy to create (just a tad tedious), all you need is some spray paint, wash tape, and thumb tacks. Easy breezy. So check out all the pics below with some simple how-to’s on creating a similar look. And I’d love to hear how you’ll be carving (or not carving) your pumpkins this year. xoxo
So let’s talk paint, spray paint that is. I love spray paint, and I especially love metallic spray paint. I used metallic silver, gold, and high gloss white. **TIP** just make sure your pumpkins are COMPLETELY dry before decorating…let the rest 24 hours. And pumpkins aren’t the only thing that look amazing spray painted as you can tell from our spray painted candy corn and mini candy pumpkins. Plus the spray paint helps me not eating a bag at a time!
The gold candy pumpkins looking amazing in our Rosanna Compote
Gold spray painted candy corn
My love for Washi tape just grows and grows. You can do SO much with it, and it doesn’t ruin any surfaces so it’s perfect for crafting projects. For my Washi pumpkin I used our black and white striped washi and simply ran it down the seams of the pumpkin. Then wrapped the entire stem as well. It only took 10 minutes and I only used about 1/4 of the Washi roll. If you haven’t tried Washi yet…it’s definitely a Martha MUST! **TIP** Use the back of your scissors and run down each Washi strip to appropriately stick the tape on the pumpkin.
Lastly we’re on to the thumb tacks. Not difficult, but the most timely DIY pumpkin project. You’ll simply need about 500 or so silver and gold thumb tacks…I found mine at the dollar store. Then simply tack your favorite pattern on to the pumpkin. **TIP** Make sure you get smooth surfaced pumpkins and as symmetrical as possible.
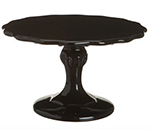
Out of the 3 thumb tacked pumpkins this one was the easiest because you can simply follow the seams of the pumpkin. And how fab does it look sitting on our Rosanna Noir Cake Stand?
Make sure you slightly overlap each thumbtack and when tacking in the seams be careful not to push them in too deep because they can take off some of the spray paint.
So everyone knows I love chevron. I first taped one of the pumpkins with blue tape in a chevron pattern and then spray painted it, but that was an epic fail. Because pumpkins are by no means flat so the spray paint seaps down under the tape and therefore no clean pattern. Since I didn’t feel like busting out the paint to try it a second time I thought I’d do it with thumbtacks. This was the most difficult one to do, but I didn’t stencil it out ahead of time which would have made it much easier and more symmetrical. However, perfection can be boring so winging it isn’t always a bad thing.
Loved the swirl, it looks so amazing from the top and the bottom! If you’re going to attempt this pattern my only suggestion would be to choose a medium or small pumpkin, if I would have done this on a larger one it would have taken forever!
So in review all we needed was, pumpkins, spray paint, thumb tacks, and washi tape…of course the gorgeous table decor helped (shockingly you can find it all in our Boutique). I hope these creations inspire you to make some un-traditional choices this holiday season!